Page 46 - Physics
P. 46
Physics for Secondary Schools


             5.  When a screw gauge with a least        2.  Hold the steel ball in the gap while
                count of 0.01 mm is used to measure        rotating the thimble clockwise until
                the diametre of a wire, the reading        it gently grips the ball.
                on the sleeve is found to be 0.5 mm     3.  Keep rotating the ratchet knob until
                                                           it clicks.
                and the reading on the thimble is       4.  Record your observations.
                found to be 27 divisions. What is the   5.  Unscrew the thimble slightly. Free
                correct diametre of the wire, if the       the ball and turn it through a certain
                zero error for the gauge is -0.005 cm?     angle. Then repeat step 3 and 4.
                                                        6.  Repeat step 5 for different rotation
                 Acti vity 2.3                             angle.
                                                        7.  Re-measure the diametre of the steel
             Aim:        To measure the diametre           ball using the vernier calliper and
                         of a steel ball using a           record your readings.
                         micrometre screw gauge.       Questions

             Materials:  Micrometre screw gauge         (a)  Calculate the average of the obtained
                         and steel ball                    readings.
             Procedure                                  (b)  Why would you prefer a micrometre
                                                           screw gauge over a vernier calliper
             1.  Unscrew the thimble to create a gap       when measuring the diametre of a
                between the anvil and the spindle.         steel ball?


           A micrometre screw gauge is more accurate than a vernier calliper. It measures up to
           three decimal places in the unit of mm. This means that its degree of accuracy is to the
           nearest thousandth of a centimetre. Unlike a micrometre screw gauge, a vernier calliper

           can only measure to a hundredth of a centimetre.


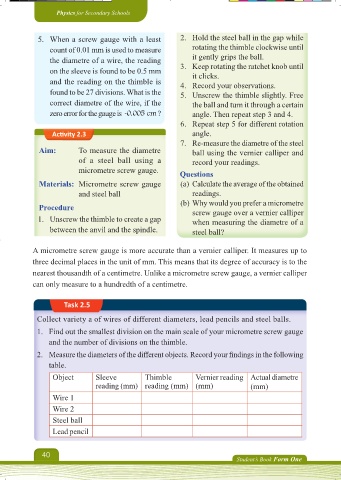
                    Task 2.5
            Collect variety a of wires of different diameters, lead pencils and steel balls.

            1.  Find out the smallest division on the main scale of your micrometre screw gauge
                and the number of divisions on the thimble.
            2.  Measure the diameters of the different objects. Record your fi ndings in the following
                table.
                 Object       Sleeve         Thimble        Vernier reading  Actual diametre
                              reading (mm) reading (mm) (mm)                 (mm)
                 Wire 1
                 Wire 2
                 Steel ball
                 Lead pencil


              40
                                                                         Student’s Book Form One


     Physics Form 1 Final.indd   40                                                         16/10/2024   20:55

