
Page 528 - Computer_Science_F5
P. 528
Edition for your operating system. Follow the installation instructions for
your platform.
Step 2: Start MongoDB server
After installation, start the MongoDB server. On most systems, you can start Chapter Eight: Databases and Database Management Systems
FOR ONLINE READING ONLY
the MongoDB server by running `mongod` in your command prompt.
Step 3: Connect to MongoDB
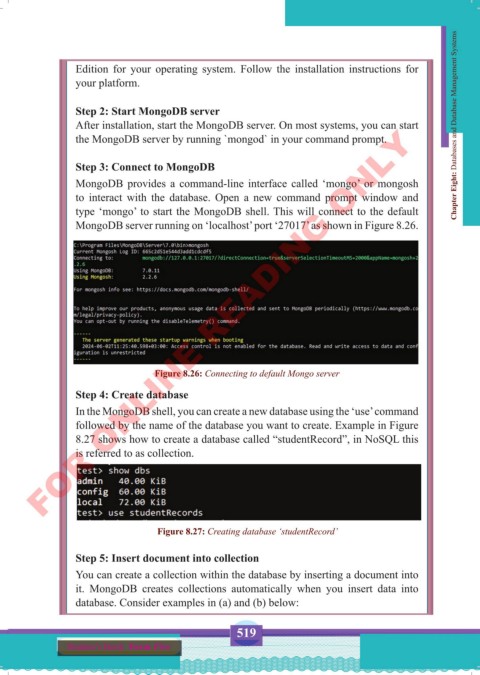
MongoDB provides a command-line interface called ‘mongo’ or mongosh
to interact with the database. Open a new command prompt window and
type ‘mongo’ to start the MongoDB shell. This will connect to the default
MongoDB server running on ‘localhost’ port ‘27017’ as shown in Figure 8.26.
Figure 8.26: Connecting to default Mongo server
Step 4: Create database
In the MongoDB shell, you can create a new database using the ‘use’ command
followed by the name of the database you want to create. Example in Figure
8.27 shows how to create a database called “studentRecord”, in NoSQL this
is referred to as collection.
Figure 8.27: Creating database ‘studentRecord’
Step 5: Insert document into collection
You can create a collection within the database by inserting a document into
it. MongoDB creates collections automatically when you insert data into
database. Consider examples in (a) and (b) below:
519
Student’s Book Form Five
Computer Science Form 5.indd 519 23/07/2024 12:35