
Page 132 - Textile_and_Garment_Form3
P. 132
Textiles and Garment Construction
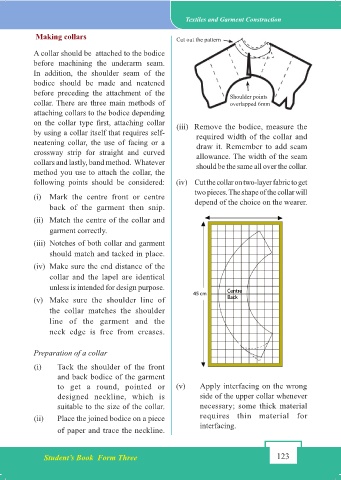
Making collars Cut out the pattern
A collar should be attached to the bodice
before machining the underarm seam.
In addition, the shoulder seam of the
bodice should be made and neatened
before preceding the attachment of the Shoulder points
collar. There are three main methods of overlapped 6mm
attaching collars to the bodice depending
on the collar type first, attaching collar (iii) Remove the bodice, measure the
by using a collar itself that requires self- required width of the collar and
neatening collar, the use of facing or a draw it. Remember to add seam
crossway strip for straight and curved allowance. The width of the seam
collars and lastly, band method. Whatever should be the same all over the collar.
method you use to attach the collar, the
following points should be considered: (iv) Cut the collar on two-layer fabric to get
two pieces. The shape of the collar will
(i) Mark the centre front or centre depend of the choice on the wearer.
back of the garment then snip.
(ii) Match the centre of the collar and
garment correctly.
(iii) Notches of both collar and garment
should match and tacked in place.
(iv) Make sure the end distance of the
collar and the lapel are identical
unless is intended for design purpose.
(v) Make sure the shoulder line of
the collar matches the shoulder
line of the garment and the
neck edge is free from creases.
Preparation of a collar
(i) Tack the shoulder of the front
and back bodice of the garment
to get a round, pointed or (v) Apply interfacing on the wrong
designed neckline, which is side of the upper collar whenever
suitable to the size of the collar. necessary; some thick material
(ii) Place the joined bodice on a piece requires thin material for
of paper and trace the neckline. interfacing.
Student’s Book Form Three 123
2022/11/17 16:15:12
BOOK TEXTILE FINAL 13.09.2022 FINAL.indd 123 2022/11/17 16:15:12
BOOK TEXTILE FINAL 13.09.2022 FINAL.indd 123